


Cylinder Head Removal, Installation, and Valve and Seat Service
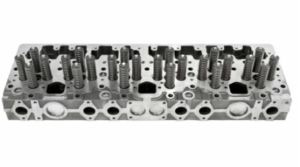
The cylinder head of the Cummins ISM, ISMe, and QSM11 engines plays a critical role in combustion efficiency, air-fuel mixture control, and engine cooling . Proper removal, installation, and servicing of the valves and seats are essential for maintaining optimal performance, fuel efficiency, and longevity .
This guide provides step-by-step procedures for removing and installing the cylinder head, inspecting components, servicing valves and seats, and performing final assembly checks .
For exact torque values, valve clearance settings, and service tolerances , consult an OEM service manual or reach out to Diesel Pro Power for expert assistance.
Parts Catalog for ISM Cummins Marine and Industrial Engines
Cylinder Head & Related Components for Cummins ISM engine
Parts Catalog for QSM Cummins Marine and Industrial Engines
Cylinder Head & Related Components for Cummins QSM11 engine
Safety and Preparation Before Cylinder Head Service
Servicing a cylinder head requires attention to detail, precise measurements, and proper handling techniques to avoid gasket failures, warping, or improper valve operation .
Personal Protective Equipment (PPE)

✔
Safety glasses
– Protects against debris and metal shavings.
✔
Mechanic gloves
– Prevents cuts and chemical exposure.
✔
Steel-toe boots
– Protects against heavy falling parts.
✔
Hearing protection
– Recommended when using
grinders or impact tools
.
Work Area and Tool Preparation
- Ensure a clean workspace free from contaminants.
- Have all tools and measuring instruments properly calibrated .
- Use an engine hoist
to safely remove and install the cylinder head.
Essential Tools for Cylinder Head Service

✔
Torque wrench
– For proper bolt tightening.
✔
Valve spring compressor
– For removing and reinstalling valve assemblies.
✔
Feeler gauges
– For measuring
valve clearance settings
.
✔
Dial indicator
– For checking
valve seat concentricity
.
✔
Cylinder head straightedge
– For measuring
deck surface flatness
.
Step-by-Step Cylinder Head Removal and Installation
Step 1: Preparing for Cylinder Head Removal
- Drain the Engine Coolant and Oil
- Open the radiator drain valve and allow coolant to fully exit .
- Drain the
engine oil
completely before removing the head.
- Disconnect Air Intake, Exhaust, and Fuel System Components
- Remove air intake piping and turbocharger connections .
- Unbolt the exhaust manifold and disconnect the downpipe.
- Detach
fuel lines and injectors
, labeling them for reinstallation.
- Remove the Valve Cover and Rocker Assembly
- Unbolt the valve cover and lift it off .
- Remove
rocker arms, pushrods, and injectors
in the correct order.
Step 2: Cylinder Head Removal Procedure

- Loosen Cylinder Head Bolts in Sequence
- Use a crisscross pattern to prevent warping or cracking .
- Start from the outer bolts and work toward the center
.
- Lift the Cylinder Head Using an Engine Hoist
- Secure lifting points evenly to prevent stress on the head .
- Lift the head straight up and place it on a clean workbench
.
- Inspect the Cylinder Head for Damage
- Check for cracks, warping, or blown gasket areas .
- Use
a straightedge and feeler gauge
to measure
deck flatness
.
Step 3: Cylinder Head Inspection and Cleaning

- Clean the Cylinder Head Thoroughly
- Remove carbon deposits, oil residue, and gasket material .
- Use
a soft wire brush to clean combustion chambers
.
- Check for Warping and Deck Surface Flatness
- Place a precision straightedge across the head .
- Use feeler gauges to check for gaps
—warping beyond
0.003 inches (0.08mm)
requires resurfacing.
- Inspect Coolant Passages for Blockages
- Use a
borescope or flashlight
to check for corrosion or debris.
- Use a
borescope or flashlight
to check for corrosion or debris.
Cylinder Head & Related Components for Cummins ISM engine
Cylinder Head & Related Components for Cummins QSM11 engine
Valve and Seat Service for Cummins ISM, ISMe, and QSM11
The valves and seats control the air-fuel mixture intake and exhaust gas flow . Proper servicing ensures tight sealing, optimal compression, and reduced wear .
Step 1: Removing Valves and Springs

- Use a Valve Spring Compressor
- Compress the valve springs and remove the keepers .
- Carefully lift out
valves, springs, and retainers
.
- Inspect Valve Faces and Stems for Wear
- Look for burn marks, cracks, or erosion .
- Check valve stem diameter
for excessive wear.
- Measure Valve Seat Width and Contact Area
- Use a dial indicator to check seat concentricity .
- If wear exceeds specifications, the valve seats must be re-machined
.
Step 2: Reconditioning Valves and Seats
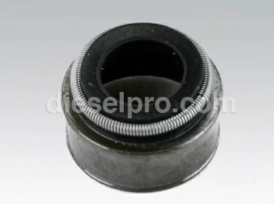
- Resurface Valve Faces Using a Valve Grinder
- Remove
minimal material
to restore a
flat sealing surface
.
- Remove
minimal material
to restore a
flat sealing surface
.
- Cut and Lap Valve Seats
- Use seat-cutting tools to restore seat angles .
- Lap the valves using
lapping compound
to achieve
a perfect seal
.
- Verify Seat Contact Width
- Seat width should be between 1.5mm and 2.5mm .
- If the seat is
too wide, narrow it with a seat-cutting tool
.
Step 3: Installing Valves and Springs
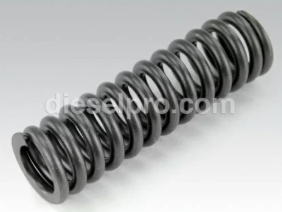
- Lubricate Valve Stems and Install Valves
- Apply clean engine oil to valve stems before installation .
- Insert
valves carefully into their respective guides
.
- Install Valve Springs, Retainers, and Keepers
- Use a valve spring compressor to seat the retainers properly.
- Ensure
keepers are fully seated before releasing spring tension
.
- Check Valve Seating and Stem Clearance
- Rotate the valve by hand to verify smooth movement .
- Check stem-to-guide clearance using a dial indicator .
Cylinder Head Installation Procedures
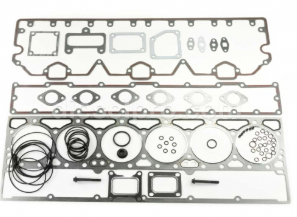
After valve servicing , the cylinder head must be installed correctly to prevent gasket failures and coolant leaks .
Step 1: Preparing for Cylinder Head Installation
- Clean the Cylinder Block Deck Surface
- Remove old gasket residue using a plastic scraper.
- Ensure
bolt holes are clean and free of debris
.
- Install a New Head Gasket
- Place the
gasket on the block
and align coolant and oil passages.
- Place the
gasket on the block
and align coolant and oil passages.
Step 2: Cylinder Head Bolt Tightening Procedure
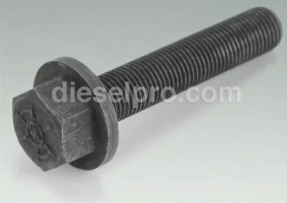
- Lower the Cylinder Head Evenly onto the Block
- Use an
engine hoist
to
prevent misalignment
.
- Use an
engine hoist
to
prevent misalignment
.
- Torque Cylinder Head Bolts in Stages
- Tighten bolts in a specified sequence (usually from center outward).
- Apply proper torque in multiple passes
following OEM specifications.
- Reinstall Rocker Arms, Pushrods, and Injectors
- Adjust valve lash to proper clearance settings .
- Secure the
injectors and reconnect fuel lines
.
Step 3: Final System Checks
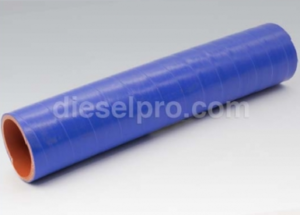
- Reattach Coolant Hoses and Fill with Proper Coolant
- Use Cummins-approved coolant
to prevent
corrosion and scaling
.
- Use Cummins-approved coolant
to prevent
corrosion and scaling
.
- Reconnect Air Intake, Turbo, and Exhaust Components
- Secure
all clamps and gaskets properly
.
- Secure
all clamps and gaskets properly
.
- Start Engine and Perform Initial Tests
- Check for oil leaks, coolant leaks, and unusual noises .
- Verify
engine performance and valve operation
.
Final Notes on Cylinder Head Maintenance for Cummins ISM, ISMe, and QSM11
✔
Always follow proper torque sequences to prevent warping.
✔
Use precision measuring tools to verify valve and seat clearances.
✔
Ensure clean assembly to prevent oil or coolant contamination.
✔
Consult an OEM manual or Diesel Pro Power for expert guidance.
By following these best practices for cylinder head removal, valve servicing, and reinstallation , you ensure optimal engine performance and long-term reliability for Cummins ISM, ISMe, and QSM11 engines .
Parts Catalog for ISM Cummins Marine and Industrial Engines
Cylinder Head & Related Components for Cummins ISM engine
Parts Catalog for QSM Cummins Marine and Industrial Engines
Cylinder Head & Related Components for Cummins QSM11 engine