


Introduction: Why Cooler Maintenance Is Critical for Twin Disc MG-5090A Marine Gear
The oil cooler is an essential component of the Twin Disc MG-5090A marine gear system. It ensures that transmission fluid remains within the correct operating temperature range—typically between 140°F to 180°F —by transferring heat away from the hydraulic oil. Without adequate cooling, transmission oil can overheat, degrade rapidly, and lead to premature wear of clutches, gears, bearings, and seals.
Because marine environments expose cooling circuits to salt, silt, barnacles, marine growth, corrosion, and mineral scale , cooler maintenance is absolutely vital. Even partial blockages can impair heat transfer and lead to dangerous spikes in temperature.
This comprehensive guide walks you through cooler maintenance best practices, from safe removal and flushing to pressure testing and component replacement, tailored specifically for the Twin Disc MG-5090A.
Function of the Oil Cooler in the MG-5090A Transmission

The MG-5090A uses a heat exchanger-style cooler to regulate the temperature of its transmission oil. Most marine installations rely on either:
- Seawater-to-oil (raw water)
- Freshwater-to-oil (closed loop with a separate cooling tank)
Regardless of design, the purpose is the same: remove heat from the oil and maintain viscosity and hydraulic pressure within design tolerances.
Key Roles of the Cooler:
- Prevent oil breakdown
- Maintain consistent hydraulic pressure
- Reduce thermal expansion in internal components
- Extend the life of clutches and seals
Signs Your Cooler Needs Maintenance or Replacement
Cooler performance degrades over time, especially in saltwater environments. Here are warning signs your oil cooler may be underperforming or failing:
- Oil temperatures exceeding 200°F
- Transmission slipping or engaging harshly
- Discolored or burnt-smelling oil
- Increased frequency of clutch wear or overheating events
- Presence of water in oil (from cooler failure)
- Low oil pressure at idle or under load
If you see any of the above indicators—especially after long idle periods or seasonal storage—immediate cooler inspection is recommended.
Maintenance Frequency and Best Practices for MG-5090A Cooler
The cooler should be serviced at least once every 12 months , or every 1,000 hours of transmission operation, whichever comes first.
Ideal Maintenance Timing:
- During annual haul-out or drydock
- When performing a full oil change or clutch inspection
- Following heavy silt exposure or overheating events
For commercial vessels or tugboats, 6-month intervals are recommended due to more aggressive cooling demands and saltwater exposure.
Tools and Supplies Required for MG-5090A Cooler Maintenance
Before servicing the cooler, prepare the proper equipment to safely remove and restore it.
Tools:
- Hose clamp driver or socket set
- Flathead screwdriver (for prying hoses gently)
- Adjustable wrenches for oil line fittings
- Clean bucket or pan for fluid collection
- Garden hose or pressure washer (with control nozzle)
- Rubber mallet (optional)
- Flashlight and inspection mirror
- Pressure gauge with adapter (rated to 50 PSI)
- Torque wrench (for reinstallation)
Supplies:
- Fresh water supply (dock or tank-fed)
- Descaling solution or marine-safe acid flush
- Borescope (optional for internal inspection)
- Teflon tape or thread sealant (as required)
- Replacement hose clamps or fittings
- Rags, gloves, and safety goggles
- Replacement cooler gaskets or mounting hardware (if removed)
Recommendation: Diesel Pro Power stocks oil coolers, seals, and maintenance parts compatible with the Twin Disc MG-5090A marine gear.
Step-by-Step Cooler Maintenance Procedure for Twin Disc MG-5090A
Step 1: Prepare for Cooler Removal
- Turn off the engine
and allow the transmission to cool.
- Disconnect battery power
if working in confined spaces.
- Label oil and water hoses
to ensure correct reconnection later.
- Close any
seawater intake seacocks
or freshwater feed valves.
- Place absorbent mats or drip trays beneath cooler assembly.
Step 2: Isolate and Remove the Oil Cooler
- Loosen
hose clamps
and carefully disconnect the
inlet and outlet hoses
.
- Drain residual oil or water into a pan or absorbent rag.
- Use a wrench to disconnect
oil supply and return lines
.
- Gently unbolt or detach the cooler from its mounting bracket or cradle.
Caution: Oil may still be present in the lines. Handle the cooler over a drain pan.
Step 3: Inspect Cooler for Obvious Damage
Before flushing, examine the cooler for:
- Cracked end caps
- Corrosion around hose fittings
- Damaged mounting brackets
- Signs of salt creep or scale buildup
- Oil seepage from weld seams or brazed joints
If damage is visible, replacement is often more economical than attempting repair.
Step 4: Flush With Fresh Water
- Connect a
garden hose
or freshwater supply to the
output end
of the water jacket (reverse flow).
- Run water through the system for 10–15 minutes to
backflush
marine growth, sediment, or mineral buildup.
- Inspect water exiting the cooler for debris, discoloration, or restricted flow.
Tip: Tapping the cooler lightly with a rubber mallet during flushing can help dislodge internal scale.
Step 5: Apply Descaling Solution
If mineral buildup is suspected (especially from seawater or brackish conditions):
- Fill cooler with a
marine descaling solution
(phosphoric acid-based or vinegar-based for aluminum units).
- Let soak for 30–60 minutes depending on product instructions.
- Rinse thoroughly with fresh water to remove all chemical residue.
Note: Never use hydrochloric (muriatic) acid—it can destroy aluminum or copper-nickel elements.
Step 6: Flush the Oil Side (If Separate)
If the cooler features separate oil and water circuits , flush the oil side as well:
- Fill with clean transmission oil
- Rotate cooler to agitate
- Drain into a clear container to inspect for contamination or metal shavings
Optional: Use pressurized flush canisters if compatible.
Step 7: Perform a Pressure Test
To verify the structural integrity of the cooler:
- Plug all outlets except one
- Pressurize the internal cooling jacket (water side) to 30 PSI
- Hold pressure for 15 minutes and monitor for:
- Pressure drop
- Fluid weepage
- Air bubbles in soapy water applied to external seams
Fail Criteria:
- Any pressure loss = internal crack
- Oil-to-water leak = cooler failure and immediate replacement
Step 8: Inspect and Replace Supporting Hardware
While the cooler is out:
- Replace corroded hose clamps
- Check hoses for softness, bulging, or cracking
- Inspect oil line fittings for worn threads or leaks
- Replace gaskets, O-rings, or thermal relief valves if used
Tip: High-grade stainless hose clamps are recommended for saltwater vessels.
Step 9: Reinstall Cooler
- Reattach cooler to its mounting bracket.
- Reconnect
oil lines first
, ensuring tight but not over-torqued connections.
- Reconnect
water hoses
, ensuring secure clamp placement and orientation.
- Reopen
seacocks
or cooling loop valves.
- Top off transmission oil if any fluid was lost during cooler flushing.
Step 10: Start Engine and Inspect Operation
- Run engine at idle for 10 minutes.
- Shift between forward and reverse to circulate oil.
- Check oil temperature using an
infrared thermometer
or temperature sensor.
- Monitor for leaks around:
- Hose ends
- Threaded fittings
- End caps or seams
Normal Operating Range:
Transmission oil temp should stabilize between
140°F and 180°F
.
If it exceeds 190°F , recheck flow rates or inspect for partial cooler blockage.
Troubleshooting Common Cooler Issues on the MG-5090A
Overheating Despite Cooler Service
- Cause: Partially blocked oil passages or internal pump failure
- Fix: Check pump output pressure; inspect filter and oil viscosity
Water in Oil
- Cause: Cooler core rupture
- Fix: Replace cooler immediately, flush oil system
Coolant Leaks at Hose Ends
- Cause: Loose clamps or corroded nipples
- Fix: Replace hose clamps or fittings
Reduced Cooling Performance After Descaling
- Cause: Internal scale not fully removed
- Fix: Repeat flushing or replace cooler if buildup is extensive
Replacement Recommendations
If a cooler:
- Fails a pressure test
- Is over 10 years old
- Shows internal or external corrosion
- Has suffered saltwater freezing
…it’s often more cost-effective to replace it entirely .
Diesel Pro Power offers aftermarket coolers compatible with MG-5090A units, designed to meet OEM flow and pressure specs, with corrosion-resistant materials for longer life.
Pro Tips for Cooler Longevity
- Install a seawater strainer upstream to reduce marine debris
- Flush with freshwater after each voyage if using raw water cooling
- Add zinc pencil anodes to the water jacket to prevent galvanic corrosion
- Use closed-loop freshwater systems in high-salinity environments
- Label service intervals on cooler housing with a grease pencil or decal
Summary: Cooler Maintenance Is a Non-Negotiable for MG-5090A Health
The oil cooler on your Twin Disc MG-5090A is not an accessory—it’s an essential line of defense. A clogged, scaled, or failing cooler can silently degrade your transmission until the damage is irreversible. Routine cleaning, pressure testing, and part replacement will preserve your equipment, prevent thermal overload, and extend transmission life far beyond the expected minimum.
Quick Reference Maintenance Chart:
Maintenance Task |
Frequency |
Tools Needed |
Critical Notes |
| Flush with freshwater | Every 12 months | Hose, bucket | Backflush to remove debris |
| Descale internal tubes | Every 12–24 months | Descaler, gloves | Avoid acidic cleaners not rated for marine use |
| Pressure test | Every 1,000 hours | 30 PSI gauge | Replace cooler if leak or pressure drop detected |
| Hose & clamp inspection | With each oil change | Flashlight, driver | Replace cracked or soft hoses |
| Full cooler replacement | Every 5–10 years | Wrenches, sealant | Especially in salt-heavy zones |
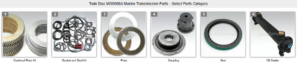
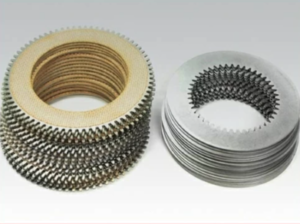
Overhaul Plate Kit For Twin Disc MG5090A Marine Transmission Gasket Kits For Twin Disc MG5090A Marine Transmission
Videos About Twin Disc Transmissions
6 Reasons Your Twin Disc Transmission Has Low Oil Pressure
7 Reasons Your Twin Disc Transmission Is Overheating
3 Reasons Your Clutch Plates in Your Twin Disc Transmission Are Making Excessive Noise
Bull Gear On A Twin Disc Transmission
Rebuilt Twin Disc Transmissions
