


Engine Removal and Installation Procedures
Maintaining Cummins ISM, ISMe, and QSM11 engines requires proper engine removal and installation when performing major repairs, overhauls, or replacements . These heavy-duty diesel engines power on-highway trucks, industrial machinery, marine vessels, and power generators , making accurate removal and reinstallation crucial for long-term reliability and efficiency .
This comprehensive guide provides detailed step-by-step instructions for engine removal and installation , covering safety procedures, required tools, proper lifting techniques, component disconnections, mounting procedures, and initial startup checks .
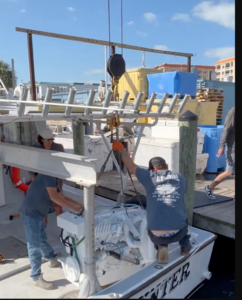
Below, the YouTube Video Shows Diesel Pro Customer Imperial Diesel Service, LLC removing two smaller Cummins engines from a Bertram 31 [Engines Featured in the video: Cummins 6BT].
For specific torque values, lifting specifications, and technical guidance , refer to an OEM service manual or contact Diesel Pro Power for expert assistance .
Torque Specs for Cummins Engines
Parts Catalogs
Parts Catalog for ISM Cummins Marine and Industrial Engines
Parts Catalog for QSM11 Cummins Marine and Industrial Engines
Safety and Preparation Before Engine Removal
Removing a Cummins ISM, ISMe, or QSM11 engine involves handling heavy components, high-pressure fuel lines, and electrical connections . To prevent personal injury or component damage , follow these safety precautions .
Personal Protective Equipment (PPE)

✔
Safety glasses
– Protect against debris and fuel splashes.
✔
Mechanic gloves
– Prevents hand injuries from sharp edges and hot components.
✔
Steel-toe boots
– Protect against heavy falling parts.
✔
Hearing protection
– Reduces noise exposure in
high-decibel environments
.
Work Area Preparation
- Ensure a well-lit, clean workspace free of obstacles.
- Use engine hoists, lifting slings, and support stands rated for at least 2,000 lbs (900 kg) .
- Drain engine oil, coolant, and fuel to prevent spills .
- Label all electrical connectors, hoses, and mounting bolts for proper reinstallation.
- Have
an OEM service manual or repair guide on hand
for torque values and component specifications.
Step-by-Step Engine Removal Procedures
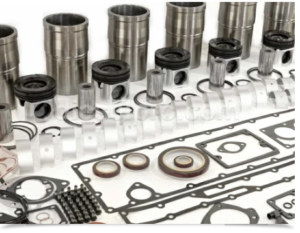
Removing a Cummins ISM, ISMe, or QSM11 engine requires a logical sequence of disconnections and lifting maneuvers . Follow these structured steps for safe and efficient removal .
Step 1: Disconnect the Battery and Electrical Components
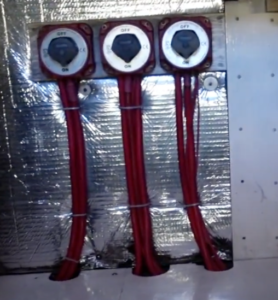
- Disconnect the Negative (-) Battery Terminal First
- Prevents accidental short circuits or ECM damage .
- Secure disconnected cables away from contact points.
- Unplug All ECM and Wiring Harness Connections
- Label each connector for easy reinstallation.
- Inspect wiring
for corrosion or damage
before removal.
- Disconnect the Alternator and Starter Motor Cables
- Remove battery cables from the starter .
- Disconnect the
alternator power and ground connections
.
- Remove All Ground Straps from the Engine Block
- Prevents
electrical feedback or grounding issues
during reinstallation.
- Prevents
electrical feedback or grounding issues
during reinstallation.
Step 2: Drain Fluids and Disconnect the Cooling System
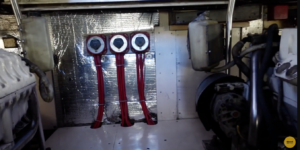
- Drain the Engine Oil Completely
- Open the oil drain plug and allow oil to fully drain into a container .
- Remove the
oil filter
to drain remaining oil.
- Drain the Coolant from the Radiator and Block
- Open the radiator drain valve and let coolant fully exit .
- Disconnect the
lower radiator hose
and drain additional coolant.
- Remove the Radiator, Coolant Hoses, and Expansion Tank
- Unbolt the radiator assembly and carefully lift it out .
- Disconnect
heater core hoses and coolant bypass lines
.
Step 3: Disconnect the Fuel and Air Intake System
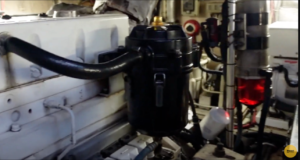
- Relieve Fuel System Pressure Before Disconnecting Lines
- Slowly loosen the fuel return line fitting to release pressure.
- Disconnect
high-pressure fuel lines from the fuel rail and injectors
.
- Cap Fuel Lines to Prevent Contamination
- Use
clean plastic caps or rags
to seal open fuel connections.
- Use
clean plastic caps or rags
to seal open fuel connections.
- Remove the Air Intake and Turbocharger Connections
- Disconnect the air filter housing and intake piping .
- Unbolt the
turbocharger mounting bracket
and secure the turbo to prevent damage.
- Remove Exhaust System Components
- Unbolt the exhaust manifold and disconnect the downpipe .
- Inspect
exhaust gaskets and turbo mounting surfaces
for wear.
Step 4: Unbolt Engine Mounts and Prepare for Lifting
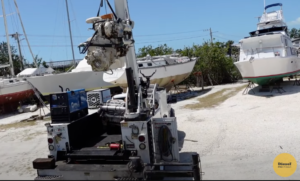
- Support the Engine with a Hoist Before Removing Mounts
- Position an engine hoist over the lifting points on the block.
- Use
heavy-duty lifting chains rated for the engine’s weight
.
- Loosen and Remove Engine Mount Bolts
- Support the engine weight with the hoist before removing bolts .
- Slowly lift the engine
slightly to check for clearance issues
.
- Check for Any Remaining Attached Components
- Ensure no hoses, electrical wires, or cables remain connected .
- Clear
any remaining obstructions
before final lifting.
- Lift the Engine Slowly and Secure It on an Engine Stand
- Move the hoist in a steady, controlled motion to prevent swinging.
- Lower the engine onto a
reinforced stand
for further servicing.
Engine Installation Procedures for Cummins ISM, ISMe, and QSM11
Once repairs or rebuilds are complete , proper installation is critical to ensure long-term durability and performance .
Step 1: Prepare the Engine for Installation
- Inspect All Engine Components for Readiness
- Verify oil seals, gaskets, and mounts are in good condition .
- Pre-lubricate
critical moving parts
to prevent dry starts.
- Verify Engine Mounting Points and Lifting Straps
- Ensure mounting brackets are aligned correctly .
- Attach
lifting chains to proper lifting points
before hoisting.
Step 2: Position the Engine in the Chassis
- Lower the Engine Slowly into Place
- Guide the engine carefully into alignment with the mounts .
- Adjust the hoist
incrementally to avoid misalignment
.
- Secure Engine Mount Bolts to Proper Torque
- Tighten bolts in a cross-pattern to ensure even distribution.
- Refer to
OEM torque specifications
for
final tightening sequence
.
Step 3: Reconnect Fuel, Cooling, and Electrical Systems
- Reinstall Fuel Lines and Bleed Air from the System
- Reconnect injectors, fuel rail, and fuel return lines .
- Prime the
fuel system
before attempting startup.
- Reconnect the Cooling System and Fill with Coolant
- Reattach the radiator, heater core hoses, and expansion tank .
- Fill the system with
Cummins-approved coolant
.
- Reconnect the Electrical Harness and Sensors
- Secure all wiring connectors, alternator cables, and battery terminals .
- Inspect
sensor wiring for proper routing
.
Step 4: Perform Initial Startup and System Checks
- Verify All Fluids are Filled to Proper Levels
- Check
engine oil, coolant, and fuel levels
before starting.
- Check
engine oil, coolant, and fuel levels
before starting.
- Start the Engine and Monitor for Issues
- Listen for unusual noises or vibrations.
- Monitor
oil pressure and coolant temperature
.
- Check for Fluid Leaks and Sensor Errors
- Inspect for fuel, oil, or coolant leaks .
- Scan for
ECM fault codes
and address any warnings.
Final Notes on Engine Removal and Installation for Cummins ISM, ISMe, and QSM11
✔
Use proper lifting equipment to avoid engine damage.
✔
Label and document all connections for smooth reinstallation.
✔
Follow correct torque values for mounting bolts and fasteners.
✔
Perform fluid checks and test startup before full operation.
✔
Consult an OEM manual or Diesel Pro Power for expert guidance.
By following these best practices , you ensure a safe and efficient engine removal and installation , minimizing downtime and maximizing the performance of your Cummins ISM, ISMe, or QSM11 engine .
Parts Catalog for ISM Cummins Marine and Industrial Engines
Parts Catalog for QSM11 Cummins Marine and Industrial Engines